
The Top 5 Mistakes Homeowners Make with Garage Epoxy Floors (and How to Avoid Them)
Epoxy Floors Done Right Start with With Knowing What Can Go Wrong
There’s a reason garage epoxy flooring has exploded in popularity across Little Rock. It looks great, it stands up to everyday abuse, and it can completely transform a stained, dusty garage into a clean, organized extension of your home. But here’s the catch: epoxy only works when it’s installed correctly.
We’ve been in this business long enough to see what happens when it’s not.
At Rock City Epoxy, we’ve been called in to fix garage floors that were supposed to last years but failed in a matter of months—sometimes weeks. Peeling coatings. Bubbling finish. Yellowing flakes. Slippery spots. Floors that cost homeowners thousands and didn’t hold up to parking a car, let alone real day-to-day life.
The truth is, most of these failures come down to a handful of preventable mistakes. Whether it’s using the wrong product, rushing the install, or skipping critical prep, the devil is in the details—and the results speak for themselves.
This guide walks you through the five biggest mistakes we see homeowners (and even some contractors) make when it comes to garage epoxy floors—and more importantly, how we avoid them on every job we do.
So if you’re in Little Rock or anywhere nearby and you're considering an epoxy floor for your garage, keep reading. This isn’t fluff. It’s what you need to know before you spend a dime on that kit from the hardware store or hire someone who “also does epoxy” on the side.
Because when it's done right, an epoxy garage floor should last for years of clean, low-maintenance performance—not months of frustration.
Mistake #1: Skipping Surface Prep (Or Doing It Wrong)
Let’s get one thing straight: if the surface prep isn’t done right, nothing else matters. Not the quality of the epoxy, not the topcoat, not the installer’s confidence level. If the floor isn’t prepped properly, it will fail. Full stop.
This is the #1 reason we get called in to rip up and redo garage epoxy floors across Little Rock—and it’s usually the first mistake homeowners (and many DIYers) make.
What Most Homeowners Don’t Realize
Garage concrete is rarely ready for coating straight out of the box. It’s often full of:
Oil stains and contaminants from years of car use
Dust, paint overspray, or previous coatings
Curing compounds or sealers left from the original pour
Moisture sitting just below the surface
Microcracks, spalling, or uneven slab conditions
And here’s the kicker—none of that goes away with a pressure washer or degreaser. No matter what that DIY kit says on the label, epoxy needs to bond to clean, porous, open concrete. If that concrete still has residue, sealed pores, or a slick finish? The epoxy has nothing to grip. And it will peel—guaranteed.
What Happens When Surface Prep Is Rushed
We’ve seen it all:
Epoxy flaking up in big sheets because it couldn’t bite into the slab
Bubbles forming because air or moisture was trapped under an unprepared surface
Delamination in high-traffic areas after just a few weeks of parking
Failed bond lines where hot tires lifted the coating off in chunks
These aren’t “bad luck” scenarios. They’re the direct result of poor prep. And once it happens, there’s no simple fix. The floor has to be completely ground off, the slab re-prepped, and a new system installed.
That means more cost, more downtime, and more frustration—all of which could’ve been avoided from the start.
What Proper Prep Actually Looks Like
At Rock City Epoxy, we don’t do shortcuts. Every garage floor we install starts with a full mechanical surface prep process that includes:
Diamond grinding using industrial equipment to remove contaminants and open the concrete pores
Dust-controlled vacuums to keep the job clean and breathable
Crack and spall repair using industrial-grade fillers designed to flex and move with the slab
Edge profiling to ensure full coverage even in hard-to-reach spots
Optional moisture testing, especially in older garages or new builds without a vapor barrier
This isn’t overkill—it’s how you create a surface that epoxy can bond to for the long haul.
We also look for red flags like:
Evidence of hydrostatic pressure (moisture pushing up through the slab)
Contaminated areas from years of car fluids or tire chemicals
Weak or chalky concrete that needs consolidation before coating
And if the slab needs more help than expected? We’ll tell you. We don’t hide slab issues just to get the job booked—we fix them, or we walk away.
Why DIY Kits and Budget Bids Skip This Step
The simple answer? Time and money.
Mechanical grinding takes real equipment, trained operators, and extra time. It also costs more than a bucket of etching acid or a bottle of degreaser. That’s why many DIY epoxy kits—and a lot of budget installers—skip it entirely.
But skipping it just shifts the cost down the road. You might save a few hundred bucks upfront, but if the floor starts peeling or failing within the first year, that savings disappears fast—and the redo costs double.
The Rock City Epoxy Difference
We treat prep as the foundation of the entire job—because it is. Every single successful garage epoxy floor we’ve installed in Little Rock and the surrounding area started with the same principle:
If the surface isn’t ready, we don’t coat it. Period.
Whether it’s a flake system, solid-color epoxy, or a hybrid build with polyaspartic topcoat, it all starts with concrete that’s been prepped the right way.
Mistake #2: Using the Wrong Type of Epoxy for the Job
One of the biggest misconceptions we hear from homeowners is this:
“Epoxy is epoxy, right?”
Not even close.
The word "epoxy" gets thrown around like it’s one single product, but there are actually huge differences in chemistry, strength, durability, and performance depending on what you're using—and where.
This is where a lot of garage floor projects go off the rails. Someone buys a $99 "epoxy paint kit" from a big-box store thinking it’ll perform like a professional-grade system. Or a contractor shows up with a low-solids coating that looks good for a month, but fails under real-life use.
Here’s what you need to know about epoxy types—and why Rock City Epoxy never installs the wrong one.
The 3 Main Types of Epoxy (And Why Only One Belongs in Your Garage)
Let’s break it down:
1. One-Part Epoxy Paint (Not Real Epoxy)
You’ll see this stuff in hardware stores marketed as “garage floor epoxy.” But read the fine print: it’s a single-component paint with a bit of resin blended in. It goes on like paint—and performs like paint.
Lifespan: 6–12 months if you’re lucky.
Why it fails: Weak bond strength, poor thickness, zero chemical resistance.
2. Water-Based Epoxy
This is a step up. It’s a two-part system with resin and hardener, but it’s diluted with water to make it easier to apply. It’s often used in residential or light commercial settings.
Lifespan: 2–5 years depending on use.
Why it fails: Limited thickness, less resistance to hot tires and automotive fluids.
3. 100% Solids Epoxy (What We Use)
This is the good stuff. It’s a high-build, industrial-grade product that cures into a dense, chemical-resistant surface. It forms a real bond with the concrete and holds up under actual garage use.
Lifespan: 10–20+ years when installed properly.
Why it works: Thick, seamless, durable—and customizable for flakes, topcoats, and more.
At Rock City Epoxy, we only use 100% solids epoxy systems for garage installs. Every job. No compromises.
It’s Not Just the Product—It’s the System
A successful epoxy floor isn’t one coat of resin—it’s a multi-layered system. And the system depends on how your garage is used.
Here’s how we build it out:
Basecoat – 100% solids epoxy, color matched and custom mixed
Broadcast Layer – Optional flake or quartz for slip resistance and appearance
Topcoat – Urethane or polyaspartic for UV protection, chemical resistance, and gloss
That’s how you get a garage floor that stands up to:
Hot tires
Oil and transmission fluid
Brake dust
Power tools and rolling toolboxes
Arkansas humidity and temperature swings
Trying to build that kind of performance with a single coat of paint? That’s a waste of money. Plain and simple.
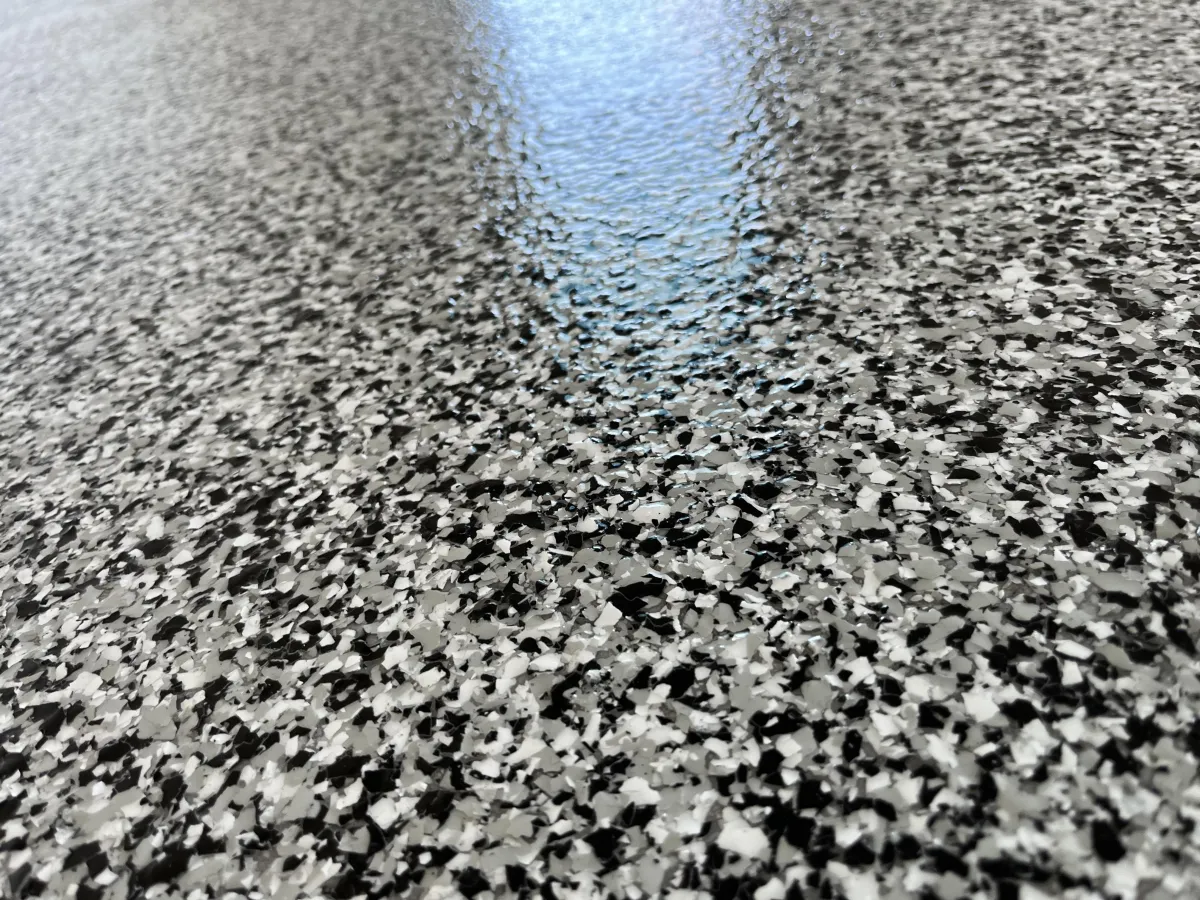
Why Flake Systems Are Perfect for Garages
Flake epoxy isn’t just for looks—though it does look sharp. The vinyl flakes we broadcast into the epoxy serve a real function:
Hide dirt and dust better than solid-color coatings
Add texture for slip resistance
Camouflage imperfections in the slab
Give a layered, finished look like showroom or commercial spaces
We fully broadcast our flakes (not just sprinkle) for a dense, even finish that locks into the basecoat. Then we seal it all in with a heavy-duty topcoat. It’s a system—not a shortcut.
How Rock City Epoxy Chooses the Right System for You
When you hire us to epoxy your garage floor, we’re not showing up with a “one size fits all” bucket. We evaluate:
The age and condition of your concrete
How you use your garage (storage vs. shop vs. vehicle traffic)
Whether you want flakes, solid color, gloss, or matte
Environmental factors like moisture or sun exposure
Then we build the system that fits—not one that just gets by.
You’ll get:
A coating that won’t peel under hot tires
A topcoat that doesn’t yellow in the sun
A slip-resistant finish that actually makes your space safer
And a final product that looks just as good a year from now as it does on install day
A great epoxy floor starts with choosing the right materials—and knowing how to use them. At Rock City Epoxy, that’s exactly what we bring to the table.
Mistake #3: Ignoring Moisture in the Slab
Moisture is the silent killer of garage epoxy floors—and one of the most overlooked risks by DIYers and undertrained contractors. It’s not something you can always see, but if it’s there under the surface and you coat over it, you’re almost guaranteed to have peeling, bubbling, or complete failure within months.
Garage slabs—especially in Arkansas—are often poured without a vapor barrier, which means moisture from the ground can slowly push up through the concrete year-round. And in places like Little Rock where humidity is high and seasonal rains are frequent, that moisture doesn’t just disappear when the weather dries out.
So how do you know if there’s a moisture issue?
Well, if you don’t test—or at least check for the warning signs—you’re gambling with your floor.
What Moisture Does to a Coating System
When moisture moves up through the concrete and hits the underside of an epoxy floor, it creates pressure—called hydrostatic pressure. And epoxy doesn’t like that. At all.
It can cause:
Bubbling or blistering under the surface
Peeling and delamination where the coating lifts off the slab
Cloudy or hazy discoloration in clear or lightly colored areas
Total system failure in spots where vapor pressure is too high
And here’s the kicker—you won’t see any of this at first. The floor may look perfect on day one. But a few weeks or months later, you’ll start to see patches lifting or flaking, especially in the corners or where the car sits.
How Rock City Epoxy Handles Moisture Risk
At Rock City Epoxy, we don’t use fancy lab equipment or charge you extra for a test most garages fail anyway. Instead, we use what actually works—experience and inspection.
Here’s how we approach it:
We look for signs of past moisture issues: dark spots, chalky residue, or areas where previous coatings have lifted
We check for garage layout and drainage: is the slab below grade? Does water sit near the entrance after a rain?
We pay attention to how the concrete reacts during prep—sometimes you can feel moisture pulling into the surface even while grinding
If we suspect there could be a problem, we don’t ignore it. We use moisture-tolerant primers and install systems designed to handle some vapor movement without failing.
That might mean:
Using a heavier basecoat
Applying a specialized primer to improve bonding
Adjusting cure times depending on humidity
Recommending a polyaspartic topcoat that allows for better breathability and UV resistance
What We Won’t Do
We won’t:
Pretend moisture isn’t a risk
Install over sealed or wet concrete
Use bargain-bin epoxy that’s known to lift when the weather changes
We’d rather lose a job than coat a floor that’s going to peel off in six months. That’s just not how we operate.
Why DIY Kits Miss the Mark
DIY epoxy kits almost never mention moisture—because they’re not built to deal with it. They rely on surface-level cleaning, one thin coat of resin, and zero prep. No primer. No understanding of slab history. No consideration for Arkansas humidity.
That’s why most of them fail. Not because homeowners didn’t follow instructions, but because the system was never designed for real-world garage conditions in the first place.
Bottom Line: You Don’t Need a Moisture Meter—You Need a Contractor Who Knows What to Look For
At Rock City Epoxy, we bring real-world experience to every job. We’ve seen what happens when moisture is ignored, and we’ve spent years learning how to spot the early signs before they cost you thousands.
If there’s a risk, we’ll tell you.
If there’s a workaround, we’ll build it into the system.
And if it’s not the right time to install, we’ll wait until it is.
Because the only thing worse than not having an epoxy floor is having one that fails.
Mistake #4: Rushing the Installation or Skipping Cure Times
Here’s a hard truth a lot of homeowners (and even some contractors) learn the hard way:
Epoxy is not paint—and it doesn’t behave like it.
When people treat epoxy like they’re just rolling on a coat of latex, things go sideways fast. Cure times are ignored. The floor gets walked on or driven over too soon. Temperature and humidity aren’t considered. And then suddenly that clean, new floor is peeling, lifting, or covered in scuffs and tire marks.
At Rock City Epoxy, we don’t take shortcuts to “get it done faster.” We take the time to do it right—because you only get one shot at a perfect bond.
The Dangers of a Rushed Install
We get it. Everyone wants a fast turnaround. But speed shouldn’t come at the cost of longevity.
When installers rush through the process—or worse, skip cure times altogether—you’re left with a floor that:
Has soft spots where the epoxy wasn’t fully cured
Traps solvents or moisture inside the coating
Becomes cloudy or discolored
Can delaminate under hot tire pressure or foot traffic
Even if it looks okay for the first few days, a rushed floor will always show its flaws over time. The bond strength isn’t there. The durability isn’t there. And the finish? It’s never as smooth, even, or consistent as it should be.
What Epoxy Needs to Cure Properly
Unlike paint, epoxy doesn’t “dry”—it cures through a chemical reaction between resin and hardener. That reaction is impacted by:
Ambient temperature
Relative humidity
Air movement
Surface temperature of the slab
Here in Little Rock, that means we plan carefully around the weather. In the summer, we adjust our mixes to slow the reaction and prevent flash curing. In the winter, we warm the materials and the environment to ensure proper bonding. We don’t install unless the slab is within spec—and we never push the schedule just to “get it done.”
Each layer of the system—primer, basecoat, flake, and topcoat—gets its own dedicated window to bond, level, and cure. When we say “let it sit overnight,” that’s not a suggestion. That’s how you get a floor that lasts 10 to 20 years without issues.
Driving or Walking Too Soon = Instant Damage
This is where many DIYers and under-trained installers blow it: they walk or drive on the floor too soon.
We’ve seen it time and time again:
Tire treads embedded in a soft surface
Footprints stuck in the topcoat
Coatings that scuff or scratch within days
Edges peeling where cars were parked before the system finished curing
Every epoxy system has a different cure timeline:
Light foot traffic: usually safe after 12–24 hours
Heavy foot traffic: 24–48 hours
Vehicle traffic: minimum 72 hours, sometimes longer depending on topcoat and weather conditions
And no—it doesn’t matter if it “feels dry.” Cure and hardness aren’t the same thing.
Why Rock City Epoxy Doesn’t Rush
Our install timelines aren’t guesswork. We give every client in Little Rock a realistic, transparent schedule—because we’re not here to win the race, we’re here to win the results.
We block off time for each phase of the install
We protect the floor between coats to keep it clean and dust-free
We walk the space with you when the job’s done to make sure it’s cured and ready
We give you clear aftercare instructions, including when to move your vehicle back in
If you need a job rushed in 24 hours with a single coat and no prep—we’re not your guys.
If you want it done right the first time, with no callbacks, no peeling, and no surprises—we’re here for that. See how we do it here.
Mistake #5: No Topcoat—or a Cheap One That Fails Fast
This one’s sneaky. A garage epoxy floor might look great when it’s first installed—even with poor prep, thin material, or a fast-cure product. But if it’s missing one critical layer, that finish is going to fade, scratch, yellow, and wear out long before its time.
That layer is the topcoat.
Skipping it—or choosing a weak one—is like waxing half a car and expecting it to shine forever. It just doesn’t work.
Unfortunately, this is one of the most common mistakes we see in the Little Rock area, especially with DIY kits and low-bid contractors. It’s also one of the biggest reasons we get called in to fix jobs that didn’t hold up.
What a Topcoat Actually Does
A proper topcoat isn’t just about making the floor shiny. It’s the first line of defense against everything your garage throws at it, including:
Hot tires and abrasion
Oil, gas, brake fluid, and other automotive chemicals
UV exposure from garage doors or windows
Scratches from tools, bikes, lawn equipment, and general traffic
Water and humidity during Arkansas’s stormy seasons
Without a quality topcoat, the epoxy underneath is exposed—and the damage starts almost immediately.
What Happens When You Skip It?
Here’s what we’ve seen on failed floors that were installed without a true topcoat:
Yellowing or amber discoloration, especially near sunlight
Surface scratching and wear that dulls the finish
Staining from fluids that soak into the epoxy base layer
Loss of gloss and traction in high-use zones
Peeling or lifting where water creeps in through exposed edges
In short? The floor looks great for a while… and then it doesn’t.
DIY Kits Almost Never Include a Real Topcoat
This is one of the ways they cut corners to keep the price low. Most “all-in-one” garage floor kits you buy at the hardware store include:
A one-part epoxy paint
A tiny bag of flakes
Maybe a roller and some gloves
And no real protective topcoat
Even when they do include a clear layer, it’s often just a thin, water-based sealer that can’t handle UV, tires, or automotive chemicals.
If you want a floor that actually lasts more than a year or two, you need a professional-grade topcoat—not something designed to hit a price point.
What We Use at Rock City Epoxy
Every garage epoxy system we install in Little Rock comes with a high-performance clear topcoat, specifically chosen based on how you’ll use your space.
We typically recommend one of two finishes:
1. Polyaspartic Topcoat
Fast cure times (return to service in 24 hours)
UV stable—won’t yellow in the sun
Excellent chemical and abrasion resistance
Great for garages that get a lot of light and action
2. Urethane Topcoat
Superb durability in high-traffic spaces
Slip-resistant finish options
More budget-friendly for homeowners who don’t need rapid cure
Excellent for heavy-use, low-light garages or shops
We don’t just “roll it on and go.” We properly prep between coats, scrape and clean flake layers (if used), and apply your topcoat with the correct build, coverage, and cure time.
You’ll get a surface that’s:
Sealed tight against moisture
Stain-resistant and easy to clean
Scratch-resistant
And built to shine for years
It’s Not Just a Finish—It’s Protection That Pays Off
A professionally applied topcoat is what turns a good epoxy floor into a great one. It preserves the color, protects the surface, and locks in that showroom-quality finish.
And it saves you money. Because when your floor stays clean, sealed, and damage-free, you’re not calling us back in two years for a repair—you’re calling us ten years later to do your shop, your neighbor’s place, or your business.
Rock City Epoxy Doesn’t Do “Bare Minimum”
If a contractor installs your garage epoxy floor without a topcoat—or tries to talk you out of one—it’s because they’re cutting costs, not doing what’s best for you.
At Rock City Epoxy, we don’t skip steps and we don’t use cheap finishes. Every garage floor we install is a complete system, designed for your climate, your lifestyle, and your long-term satisfaction.
We don’t believe in redoing jobs that should’ve been done right the first time.
Let’s Talk About Your Garage Floor
If you’ve made it this far, you already know what most folks don’t: getting an epoxy garage floor that lasts isn’t just about picking a product—it’s about doing it right, from the ground up.
At Rock City Epoxy, we’ve spent years installing garage floors across Little Rock and surrounding areas that don’t just look good—they hold up under real-world conditions. Whether you park a single car or run a full-blown home workshop, we build systems that match your lifestyle, your space, and Arkansas’s unpredictable weather.
We avoid the top 5 mistakes that ruin epoxy floors by:
Mechanically grinding the concrete, not just cleaning it
Using true 100% solids epoxy, not watered-down paint
Spotting moisture risks and adapting the system as needed
Letting each coat cure properly before moving forward
Applying a pro-grade topcoat that protects your investment for the long haul
So if you’re thinking about transforming your garage into a cleaner, tougher, better-looking space—don’t roll the dice with a DIY kit or a low-bid contractor who doesn’t specialize in this.
Call TJ at 501-408-6160
Email [email protected] or
We’ll come take a look, walk the slab, and tell you exactly what your garage floor needs—no pressure, no nonsense, no hidden costs.
Let’s build a garage floor that works just as hard as you do.


